Last Updated on December 31, 2022
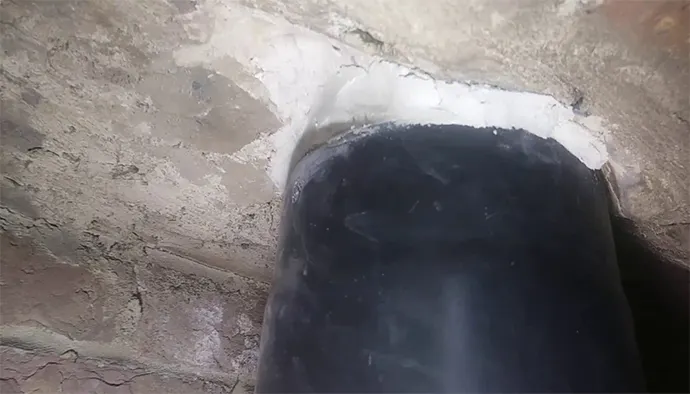
Chimney pipe is a metal tube-like structure designed to fit inside a flue or other passageway that allows smoke, fumes, and gasses from an appliance or fireplace to vent out of a building. Concrete is a type of construction material made from cement and an aggregate such as sand, gravel or crushed stone mixed with water.
When hardened, concrete is strong, durable and can be used for various construction projects such as sidewalks, walls and foundations.
The process of sealing a chimney pipe in concrete requires careful preparation to ensure the safety of all involved. The first step involves measuring the area around the existing flue or passageway where the pipe will be inserted and cutting out a suitable opening in the concrete using either a hammer and chisel or drill attachment.
Once this has been done, it is important to use a leveling agent (e.g., cement, sand, etc.) to prepare the surface for installation of the chimney liner kit. Once it has been established that everything fits correctly and tightly together, mortar mix should be applied using either shovels or trowels to secure the components into place.
Finally, waterproof tar or caulk should be applied around any joints to prevent moisture from entering the system which could lead to corrosion over time.
Gathering Materials Needed to Seal a Chimney Pipe in Concrete
Necessary Materials
1. Chimney Liner Kit – This kit contains all necessary items for sealing your chimney pipe such as connectors, elbows bends’ , adaptors etc along with instructions on how to properly install them within your existing flue/passageway
2. Leveling Agent (e.g., cement, sand, etc.) – This material serves two purposes: one is providing structural integrity when packing down soil prior to installing your liner kit; second is helping create an even surface that allows proper installation of your liner kit without gaps that may cause damage over time
3. Mortar Mix – A dry mixture composed largely of cement but also containing sand/aggregate materials which must be combined with water before it can be used as mortar between individual components when securing your chimney liner kit into place
4. Waterproof Tar or Caulk – After securing your liner kit into place using mortar mix this thick rubber sealant should be applied around any joints which will create an airtight seal preventing moisture from entering the system over time
5. Safety Gear (e.g., eye protection, rubber gloves dust masks) – During installation it is important for everyone involved in this process wear appropriate safety gear at all times including; protective eyewear dust masks and rubber gloves as you are working with potentially hazardous materials such as mortar mix/cement/tar etc..
Tools Needed
1. Hammer & Chisel/Drill Attachment – These tools are necessary for cutting out openings in concrete so that the metal chimney liner can fit properly into place
2. Shovel or Trowel – Necessary tools for applying mortar mix when securing your chimney liner kit into place
3. Measuring Tape/Ruler – Used in order make sure all components will fit correctly before beginning installation process by measuring each area that needs work on accurately
Preparing the Area Around the Chimney Pipe
Removing Debris from the Work Area
Before beginning any work, it is important to clear away any debris that may be on and around the chimney pipe. This includes anything that could interfere with the installation of the kit such as dirt, pebbles, leaves, twigs or stones.
You should also check for any type of vegetation or tree roots that may have grown around or near the pipe. If necessary you can use a shovel or a brush to remove this debris from your work area before proceeding.
Creating a Level Platform for the Chimney Liner Kit with Leveling Agent
Once all debris is cleared away, you need to create an even surface for your chimney liner kit. To do this you will need to use some type of leveling agent such as concrete mix or sand and gravel.
This material should then be spread out over the entire area surrounding your chimney pipe, ensuring that it is level and flat before proceeding further.
Preparing the Chimney Liner Kit for Installation
Applying Waterproof Tar or Caulk to Connections in the Kit
Before installing your chimney liner kit into concrete, you should check each joint connection in order to make sure they are properly tightened and waterproofed.
You can do this by applying a layer of waterproof tar or caulk around each joint connection to ensure that no moisture can enter into these areas during installation or afterwards when in use.
This will help prevent rusting and other damage caused by water exposure over time which could significantly reduce the overall lifespan of your kit if not done correctly beforehand.
Installing The Chimney Liner Kit Into Concrete
Using Hammer And Chisel/Drill Attachment To Make Holes For Insertion Into Concrete
The next step is to create holes for insertion into concrete using a hammer and chisel/drill attachment combination tool. These holes should be made at evenly spaced intervals along both sides of your chimney pipe where it will meet with its surroundings in order to ensure proper installation and stability over time once set in place with mortar mix later on in this process.
Ensure that all measurements are correct so that when installed each piece lines up properly otherwise there could be potential issues down the line during operation which should be avoided at all costs!
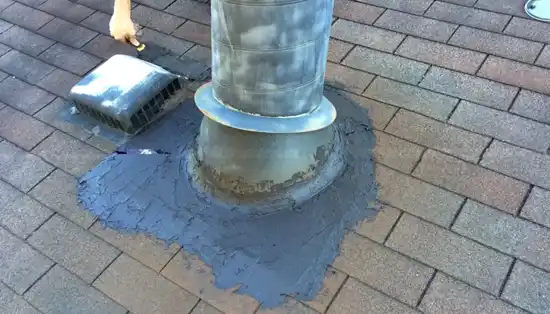
Inserting The Kit Into Pre-Made Holes And Packing Mortar Mix Around It
Once all pre-made holes are ready, now it’s time to insert your chimney liner kit into place within them while simultaneously packing mortar mix around it in order to secure everything together tightly when dry overnight later on after finishing up this process!
Be sure not to jam too much mortar mix into each hole as doing so could potentially cause structural instability which could lead to issues down the line during operation if not done correctly beforehand!
Checking That Measurements Are Correct And Making Adjustments As Needed
After inserting each side of your chimney liner kit individually into its corresponding pre-made holes, now it’s time for one final checkup before letting everything dry overnight!
Take time here to double-check each measurement carefully in order to ensure proper alignment across both sides of your chimney pipe so that when operational everything works as intended without any potential issues arising due incorrect sizing mistakes here during installation setup earlier on today! Make adjustments as necessary until everything looks perfect according to plan here before continuing onwards!
Letting Installation Dry Overnight Before Use
Lastly but certainly not least, now comes perhaps one of most important steps towards ensuring successful operation down the line – letting everything dry overnight before finally putting it all together!
Taking just a bit more patience here at this stage will pay off greatly later on due allowing enough time for cement mixture used earlier on during setup today fully cure thus providing robust support needed throughout life expectancy of product usage going forwards afterwards ultimately creating long lasting results every single time!
How thick of a layer of concrete should be used to completely seal the chimney pipe?
The thickness of the concrete layer used to completely seal a chimney pipe will depend on the type and size of pipe being sealed. Generally, for smaller pipes, it is suggested to use a minimum of 2 inches (5 cm) of concrete.
For larger pipes, 3 inches (7.6 cm) or more is recommended. Concrete should be damp cured after it has been applied and allowed to set so that it will reach its full strength, making sure to keep the area moist during this process by misting or covering with damp burlap or plastic sheeting.
Are there any weather-related concerns when using a cement-based masonry product to seal a chimney pipe?
When using a cement-based masonry product to seal a chimney pipe, there are a few weather-related concerns to consider. It’s important that both the area around and beneath the chimney pipe is dry before applying mortar or concrete and that temperatures don’t drop below freezing during installation as this could cause cracking due to expansion/contraction of the material.
Additionally, if rain is in the forecast it’s best to wait until conditions improve before beginning work as wet mortar won’t properly cure unless given time to dry thoroughly.
Is it necessary to clean or prepare the surface area surrounding the chimney pipe before mixing and installing the mortar or concrete mixture?
Preparing the surface area surrounding a chimney pipe before mixing and installing mortar or concrete is essential for achieving effective adhesion between materials as well as providing an even surface for application.
This includes cleaning off any dirt or debris from the immediate area and applying an appropriate bonding agent such as mineral spirits or latex primer prior to beginning work in order for optimal performance.
Final Words
Sealing the chimney pipe in concrete is a crucial part of any chimney installation, and should never be overlooked. It will help to prevent water from entering and damaging the structure of your house over time, as well as ensure that smoke and carbon monoxide are properly ventilated.
To guarantee the best performance of your chimney, it is vital to have an annual inspection conducted by a qualified professional. Such an inspection can help to provide additional security against further damage that may result from improper installation or use.
The professional will be able to provide an assessment of any deterioration such as cracking, flaking, or discoloration of the concrete sealant due to extreme temperatures, ultraviolet radiation exposure, moisture absorption, or other environmental factors.
Additionally, they can offer advice on any necessary repairs or replacements needed in order to preserve its functionality and safety standards. Keeping up with regular maintenance tasks like inspecting your chimney’s sealant is essential for ensuring that your home is always safe and secure against potential damage caused by water infiltration.