Last Updated on February 6, 2023
Concrete sealer is one of the most commonly used materials in construction since it helps protect against moisture, corrosion and other environmental factors. However, while concrete sealer provides a great deal of protection, it isn’t necessarily known for its aesthetic appeal.
Fortunately, there is now an easy way to add some flair and sparkle to your next project adding glitter to concrete sealer.
Adding glitter to concrete sealer can be a great way to give it a more eye-catching and unique look. Not only does glitter add an aesthetic value but also makes the sealer more durable and cost-effective too.
By following certain preparation steps and applying the glitter correctly, you can create a sparkling finish that will last for years to come. Before deciding to add glitter to your concrete sealer project however, it is important that you consider any potential implications this may have on the integrity of the material itself.
Can You Add Glitter To Concrete Sealer: Benefits
Aesthetic Value:
Adding glitter to concrete sealer not only adds a unique sparkle and shimmer to any project, but can also help create an eye-catching visual appeal. Whether you are looking for subtle accents or more dramatic effects, there are plenty of glitter finishes available that will enhance the overall look of your sealed area.
Not only will it draw attention when the light hits it just right, but it can also help boost curb appeal if used on a driveway or outdoor patio area. Moreover, certain types of glitters such as glass beads and mica chips have even been known to refract light and create a beautiful rainbow effect on walls and floors.
Durability:
Concrete sealed with glitter will last longer than those without because it provides an additional layer of protection against water damage, dirt build-up, stains, fading from UV rays, and any cracking or peeling associated with regular sealers.
The glitter particles act as tiny pieces of armor that prevent moisture and dirt from seeping through the sealer’s porous surface which can help extend its lifespan significantly over time if applied properly. And since some glitters are made out of stronger materials like mica chips or glass beads they may even increase wear resistance further too!
Cost-Effective Option:
Adding glitter to concrete sealers is surprisingly affordable given its long-term protective qualities especially compared to other decorative materials like paint or tile grout. Plus, there are plenty of budget friendly options available that won’t break your wallet either!
You can choose between pre-mixed solutions that come complete with their own applicator (for easy application) or you can purchase individual bags or bottles of loose particles at most craft stores too allowing you to tailor your own personal look for far less than other alternatives!
How To Add Glitter To Concrete Sealer
Preparation Steps
Cleaning the Surface
When adding glitter to concrete sealer, it is important to start with a clean surface. Begin by using a power washer or scrub brush and soap to remove dirt, dust, and debris from the sealer.
Be sure to thoroughly rinse off any residue. You may need to use some light sanding on any particularly stubborn areas in order to achieve a smooth surface. This will give you the best results for your glitter application.
Once the surface is clean, allow it to dry completely before continuing on with the application process. Make sure that all traces of moisture are gone or else this could impact how well the glitter adheres to the sealer.
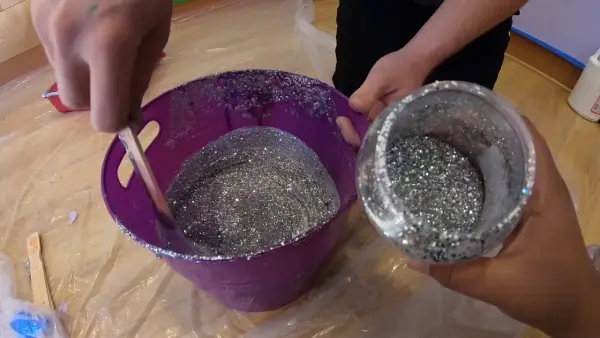
Preparing the Glitter for Application
Before actually adding the glitter, it is important to prepare it first in order for it to adhere properly to the concrete sealer. Start by determining how much glitter you will need and then pour it into a container such as a bucket or bowl so that you can easily work with it. Use a measuring spoon or cup if necessary in order to get an accurate measurement of what you need.
Next, mix an adhesive agent into your glitter in order for it to stick once applied onto the sealer. You can use craft glue, polyurethane glue, or even epoxy resin depending on what type of finish you are looking for and what type of material your project calls for.
Once mixed together well, set aside until ready for use. You may need more than one batch as you apply several coats of glue and glitter combinations in order for durability and protection against fading over time from exposure elements like sun rays or water splashes .
Applying a Bonding Agent/Primer
Applying a bonding agent/primer before applying your glitter will help ensure that your project has long-lasting results with no risk of peeling off due to poor adhesion or lack of protection from UV rays and other external elements.
Start by coating the concrete sealer evenly with an acrylic primer designed specifically for outdoor projects like yours – this will create an extra layer between your sealer and glitter that helps keep things stay put! Allow this layer of primer time to fully dry before moving onto Step 3 (the actual application of glitter).
Applying the Glitter and Sealing It In Place
Sprinkling the Glitter
Sprinkling glitter on top of concrete sealer is a great way to add extra sparkle and texture to your project. In order to do this properly, it’s important to choose a quality grade of glitter that won’t break down easily when exposed to moisture or movement.
Start by sprinkling small amounts at a time over your primed surface before using a trowel or brush to spread it out evenly. If you want more intensity in some areas, simply add more layers of glitter until you achieve your desired result.
Using Roller To Press Glitter In Place
Once you have achieved your desired effect with sprinkling and spreading out the glitter, use a roller (or similar tool) to press it firmly in place on top of the concrete sealer. This step helps lock in all of those tiny particles so they don’t move around or flake off easily over time due to wear and tear or environmental elements such as rain or snowfall.
When pressing down on certain parts of the surface make sure there isn’t too much pressure placed as this could cause damage or leave indentations behind when removing your tool.
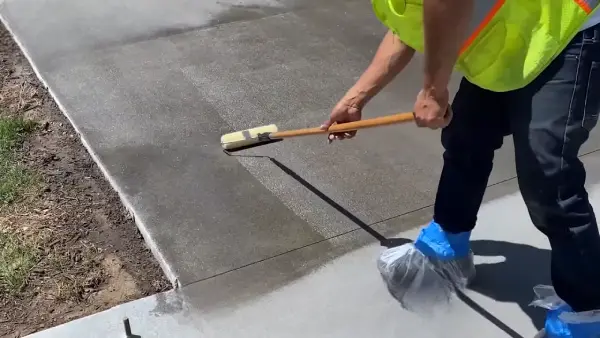
Applying Top Coat Over Glitter
The final step in adding glitter onto concrete sealer is applying a top coat over everything once it has been pressed firmly into place with a roller/tool. A good quality clear acrylic sealer is recommended for best results as this will help protect your project from further wear and tear as well as help keep all those tiny particles locked together for years to come.
Simply apply one thin layer with either a brush (for smaller projects) or sprayer (for larger projects) making sure not to miss any spots where glitter was added previously if done correctly you should have an even glossy finish upon completion!
Considerations Before Adding Glitter to Concrete Sealer
Quality of Supplies Used
When adding glitter to concrete sealer, the quality of supplies used is essential in order to ensure a successful project. It is important to pay attention to the type of glitter being used, as well as any other additives or ingredients included in the concrete sealer.
Glitter should be made from a non-toxic material such as mylar, glass, or metal and be free from sharp edges or particles that could harm people or pets. If the glitter has been colored with pigments, it should also be lead-free and safe for use around children and animals. Additionally, the concrete sealer should be high-quality and provide an even coverage when applied.
Poor quality sealers can leave gaps or patches where glitter may not adhere properly, resulting in an uneven finish. It is important to read reviews on products before making a purchase and select one that will provide the desired results when applied correctly.
Type of Surface Being Covered
In addition to paying attention to the materials used for glitzing up a concrete surface, it is also important to consider the type of surface being covered. The ideal surface should be clean and free from any dirt or debris that may interfere with adhesion of both the primer and glitter itself.
A rough surface can make it difficult for even coverage to occur during application whereas a smooth surface can make it easier for an even layer of glitter and sealer to bond together securely over time.
Applying too much pressure during application can also result in uneven coverage so care must be taken when using a roller brush or spray gun depending on which method you intend on using for your project.
Weather Conditions During Application
Before beginning any project involving concrete sealer with added sparkle, it’s essential to pay close attention to weather conditions at all times throughout the process. Too much humidity during application can cause bubbles or patches in the final product while too little humidity can affect drying time significantly resulting in vulnerable areas where dust, dirt and other matter could potentially stick more easily than intended.
In addition, if there are temperature fluctuations while applying either primer or sealer with added glitter this could have an adverse effect on adhesion leaving behind patches where only partially dry material has been left behind due to extreme cold temperatures interfering with adherence levels altogether.
For best results it’s recommended that applicators wait until temperatures are stable over several days prior starting their projects; this way they can rest assured that their material will remain secure once complete without worrying about further shifts leading them back down again after all their hard work has been done!
Time Needed for Adequate Drying
Finally, another critical aspect worth considering when adding sparkle to your concrete surfaces is how long you need for adequate drying time before applying any additional layers or coats of protection against wear and tear over time? Depending on what type of product has been used (for example epoxy based versus acrylic) this will determine just how long each individual layer needs between each coat until finally ready for usage all together once finished completely!
This could take anywhere from 24 hours up towards numerous days depending upon climate conditions outside too so always factor these into account when planning out your overall timeline prior otherwise you run into potential problems further down road due too premature sealing causing delamination issues later down line instead!
What kind of glitter do you use with epoxy?
When using glitter with epoxy, it is important to choose the right type of glitter for your project. Glitter can come in a variety of forms, including flakes, flakes mixed with pigment, powder, and chunky shapes. The best type of glitter to use with epoxy is flake or powder form.
Flake glitter offers a more subtle sparkle effect while powder glitter produces a bolder effect. It is important to pick a size that works well with the epoxy too big and it might not adhere properly while too small will not be noticeable enough. Additionally, depending on the type of epoxy you are using, some glitters may need to be sealed or treated before they can be used in your project.
How do you apply glitter powder to epoxy?
Applying glitter powder to an epoxy resin is relatively easy and straightforward. Begin by mixing the two-part epoxy according to the manufacturer’s instructions. Once the epoxy has been thoroughly mixed together it is ready for the addition of glitter powder.
When adding in the powder it’s best to sprinkle it over top of the mixture rather than stirring it in as this helps prevent it from clumping and settling at the bottom where it won’t be visible when finished. After all the desired amount of glitter has been added then stir slowly and evenly until all of it is incorporated into the resin mix it should look like liquid sand if done correctly!
Once fully mixed in let sit for 10-15 minutes before pouring into your project surface or mold so that any air bubbles have time to escape before solidifying.
How do you make concrete look fancy?
Making concrete look fancy is easier than one might think! One way to make concrete look chic and stylish is by adding colorful dyes during its mixing process which will give off bright vibrant hues when dry especially helpful if you are looking for a very specific color scheme!
Alternatively, another way to add pizzazz would be through etching or stamping designs onto its surface either before or after its curing period; this method allows for intricate patterns such as floral motifs or geometrical shapes that can really bring out any design concept you might have in mind!
Lastly if you want something more subtle but still eye-catching then applying sealant that contains mica flecks (similar looking material like galaxy stone) overtop will give your plain concrete more spunk and shine without being too overwhelming!
What is a good sealer for glitter?
A good sealer for glitter depends largely on what kind of material your applied glittered material was made from and what environment it will be exposed to once completed; however generally speaking any type of acrylic based sealers typically work well which can usually range from matte finish all the way up to glossy depending on preference.
Additionally since most glitters used nowadays are made from plastic they tend perform well when covered in polyurethane finishes which offer extra protection against UV rays as well making them great alternatives if exposed outdoors regularly!
Whichever option best fits your project just remember that multiple layers are always recommended since most sealers require at least two coats before achieving optimal results so don’t skimp out on quality here otherwise excess wear & tear may occur prematurely down later down line.
Conclusion:
In conclusion, adding glitter to your concrete sealer is a fun and creative way to give your project added aesthetics without compromising its protective qualities.
As long as you take the necessary precautions when preparing and applying the glitter, you should have no problems with achieving successful results that are both stylish and protective. With all these benefits in mind, why not try adding some sparkle and shine to your next project?