Last Updated on June 18, 2022
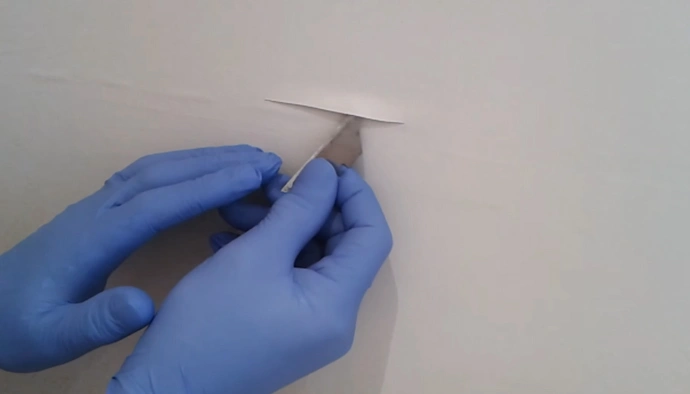
Bubbles in your painted wall usually mean that your painting job is not done correctly, or that you aren’t brushing the paint properly. In these cases, you can slit the bubbles with a scapel or stanley knife.
This will flatten the bubbles and prevent them from spreading to other parts of the wall. However, if bubbles continue to form, you need to do the entire painting process over again.
Air bubbles in wallpaper
When installing new wallpaper, one of the best ways to avoid air bubbles is to be proactive. Take it slow, smooth out the bumps, and use a sponge to press out any air bubbles.
Avoid dragging your hand across the paper because it can tear the foil designs. Rather, use light pressure with the sponge. After it has been applied to the wall, wipe off any excess glue with a damp sponge.
Alternatively, you can inject paste underneath the paper. Apply enough paste so that the bubble is covered, then brush the area down to smooth out any excess glue. Depending on the size of the bubble, you may have to apply several injections.
Once the paste dries, most bubbles will disappear. However, if they persist, you can use more paste and apply it to the surface again. Once dry, the wall covering will no longer bubble.
Regardless of the cause, the bubbles you see are likely caused by trapped air. The good news is that you can fix the problem yourself! Here are some tips to get rid of those pesky bubbles:
If you can’t afford to hire a professional wallpaper repairman, you can fix these bubbles yourself. The process is easy and only takes five minutes. And it prevents further damage.
Air bubbles in wallpaper occur when the bond between the paper and wall is weak. Or, if the paper wasn’t smoothed out, the wallpaper will start to lift. To repair an air-filled bubble, you should slit the bubble and remove the air from it.
Proper roller material
One common cause of paint bubbling on lining paper is improper use of the roller cover. Using the wrong material or nap length on your roller will result in paint bubbles. For smooth surfaces, a foam roller cover will do the job.
On semi-smooth and rough surfaces, medium or long nap rollers should be used. If you’re painting on a particularly rough surface, a long nap roller is recommended.
Excess moisture on painted walls is caused by water droplets or leaks. This excess moisture causes water-filled bubbles in the paint. They may originate in the substrate or on the top two coats. These bubbles are common in bathrooms, kitchens, and basements.
To prevent them, use rollers made from a non-abrasive material. Once you’ve applied your paint, make sure to keep these two steps in mind:
Select a roller with the correct nap and cover thickness for the surface you’re painting. A roller with a short nap will create minimal gaps and work best on smooth surfaces, while a roller with a long nap will produce a distinct orange peel texture.
If you’re painting a large surface, use a larger roller. For doors, a 4″ or 5 inch roller will do the trick.
Paints will bubble and foam during the mixing process, but they’re designed to do this. If you don’t remove the air bubbles immediately, they’ll leave craters on the film’s surface, which can dry and create uneven paint film.
You should also avoid using foam rollers with water-based paints. Lastly, do not use rollers with foam or long pile.
Proper roller nap length
To prevent the lining paper from bubbling when painting, choose the right roller nap length for the type of coating you’re painting. Depending on the coating, nap length varies from 1/4 to 1/2 inches.
You can find typical nap lengths at local home stores. If you don’t know which nap length to choose, read on to learn how to choose the perfect roller for your needs.
The right roller nap length is essential for applying the paint evenly on textured surfaces. Long naps can soak up a large amount of paint and add a lot of texture to the walls. If you have textured walls, choose a short nap roller.
Once the roller has completely soaked up the paint, apply it from the bottom, on a slight diagonal. Make sure the roller is completely saturated before painting because too much glue can cause the lining paper to bubble.
The nap density of the roller determines its quality. It depends on the type of fiber that makes it. Weaved fibers create a thick nap, making it ideal for any sheen.
Oil-based coatings also require woven rollers, as shedding fibers can leave roller marks. To avoid this problem, make sure to choose a roller that is made from woven fibers.
Paint roller naps come in different lengths, but they all have one thing in common – they absorb paint. Choose one with a shorter nap, and a long nap for surfaces that are rough.
If you’re not sure what nap length to choose, simply check the manufacturer’s specifications for the specific type of surface you’re painting. When you’re ready to begin, head to the home depot or paint store.
Heat
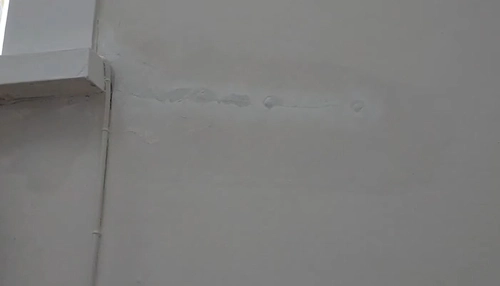
Bubbles on painted walls are an indication that the lining paper was not applied correctly. If bubbles are seen while running your hand across it, you have not properly covered the lining paper.
Here are a few tricks to get rid of bubbles. Using a stanley knife to slit them can prevent them from forming in the first place. You can also try a paperhanging brush to smooth out air bubbles.
To fix bubbles, use a syringe to apply wallpaper adhesive. ROMAN PRO-880 Ultra Clear is ideal for this task. It works with most types of wallpaper and has a long working time.
You can easily clean it afterward. Once it dries, it’s ready for use on your new wall. You can also try hanging wallpaper over lining paper. Just remember to hang the lining paper horizontally to minimize the areas where bubbles occur.
Once you have applied the lining paper, you can use the wallpaper smoother to get rid of bubbles and creases. Use the smoother on the corner that overlaps the wall. Press the smoother against the corner to create a stiff crease in the paper.
Then, safely cut the crease up with the wallpaper smoother. You can also use a paint roller to apply the final coat of emulsion.
You can also use a stanley knife to cut the lining paper so that it can’t peel back easily. This will also help you get a more even finish.
However, you need to carefully remove bubbles when you’re painting to avoid them from forming in the first place. The best way to do this is to make sure that you’ve prepared all of the required surfaces before beginning your project.
Improper roller cover
One of the most common reasons for lining paper to lift during painting is improper roller cover. When using an improper roller cover, paint may not be covered evenly or bubbles will form.
If you’re having trouble stopping lining paper from bubbling while painting, check your roller cover and lining paper before you begin painting. You should also use the proper roller nap for the surface you’re painting.
If you’re using a foam roller cover, make sure it is covered in foam. If you’re painting a smooth surface, a foam roller cover will work best.
If your surface is only slightly rough, choose a medium or long nap roller cover. If you’re painting a wall with a rough surface, a longer nap roller will give you a smoother finish.
To prevent bubbles, make sure your roller cover is completely covered. You don’t want to have to chase bubbles out of your new wallpaper! If the paint has dried, you can use a scraper to remove the bubbles. If the bubbles persist, you can apply a second coat of paint. It may take a couple of days for the bubbles to go away.
A poor quality roller cover is another common cause of bubbles in paint. This can prevent the paint from adhering to the lining paper. It may also lead to bubbles on the surface.
Excess moisture in a painted surface can come from several sources, including water droplets. If the paint is applied too quickly, it may be too wet and may cause bubbles.
Frequently Asked Questions (FAQs)
-How can I avoid my lining paper from bubbling when painting over it?
To avoid your lining paper from bubbling when painting over it, make sure to use a primer before painting. This will help to create a smooth surface for your paint to adhere to.
-What could be causing my lining paper to bubble when painting?
There are a few things that could be causing your lining paper to bubble when painting. It could be that the paper is old and not in good condition anymore. It could also be that the wall was not properly prepared before the paper was hung. If the wall was not primed or sanded properly, the paint can cause the paper to bubble.
-How do I fix lining paper that has already bubbled from paint?
There is no real way to fix it once it has already bubbled. You can try to remove the paint and start over, but it is probably easier to just replace the lining paper.
Last Thoughts
If you want to avoid having your lining paper bubbling when painting, make sure to apply an even layer of primer before painting.
If you’re using a paint roller, use light pressure and make sure to keep a wet edge to avoid creating bubbles. When painting with a brush, use long strokes in the same direction to avoid trapping air bubbles under the paint.