Last Updated on January 8, 2023
Sealing the top of a concrete block wall is essential for protecting the wall from water damage and ensuring it stands the test of time. With the right sealant, you can create a waterproof barrier along the top of your concrete block wall that will keep out rain, snow, and other elements.
The key benefits of sealing a concrete block wall include improved water resistance, increased durability, and enhanced aesthetics. To get the best results when sealing your concrete block wall, it’s important to take the right preparation steps, select an appropriate sealant, and know how to properly apply it.
We will also cover preparation steps for sealing a concrete block wall before learning about selecting the appropriate sealant for a concrete block wall and then discussing in detail the application process for using a quality sealant on your concrete block wall.
Finally, we’ll look at how to maintain your sealed concrete block wall going forward so you can make sure it stays in good shape over time.
Preparation Steps for Sealing a Concrete Block Wall
This involves several steps, including cleaning the surface, checking for cracks and other damage, applying primer coat if necessary, and filling in any gaps or repairing any damage as needed. By following these preparation steps, homeowners can ensure that their concrete block wall will look great and last for years to come.
Cleaning the Surface
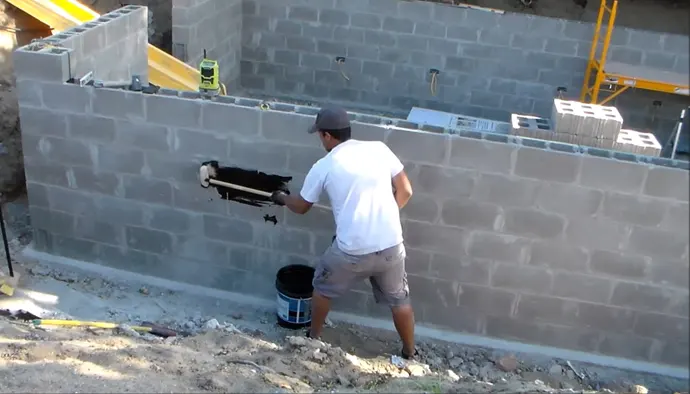
Before attempting to seal a concrete block wall, it is important to properly clean the surface. Using a pressure washer or garden hose is an effective way to remove dirt, debris, and other materials that may have accumulated on the wall over time.
Additionally, use of soap and water can be helpful in eliminating any remaining build-up from the blocks. Once this is done, it is important to allow ample time for the surface to dry before moving on to the next steps of preparation.
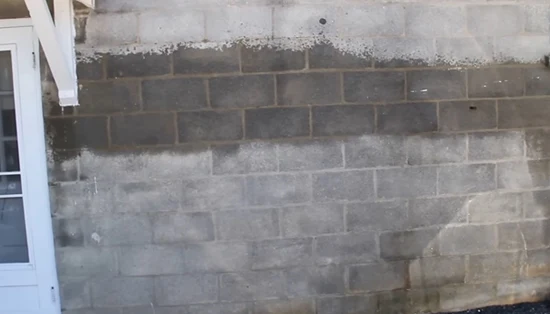
Checking for Cracks, Holes, and Discoloration
After cleaning the surface of the concrete block wall, it is essential to inspect it thoroughly for cracks, holes, or discoloration. If any of these issues are present they should be addressed before sealing commences as they can lead to further deterioration or damage if left unrepaired.
To identify these areas accurately one should examine each individual block carefully with a flashlight and check for any signs of breakage or discoloration due to water seeping in from outside sources. Any issues found should be repaired with appropriate materials such as mortar or caulk before sealing begins.
Applying Primer Coat if Necessary
Depending on the condition of the concrete block wall after inspection and repair, a primer coat may need to be applied prior to sealing. This step is critical for ensuring that paint adheres properly when added later on and also helps protect against moisture damage by providing an extra layer of protection against water seepage.
When selecting a primer it is important to choose one specifically formulated for use on masonry surfaces so that its effectiveness can be maximized when protecting the wall from external elements.
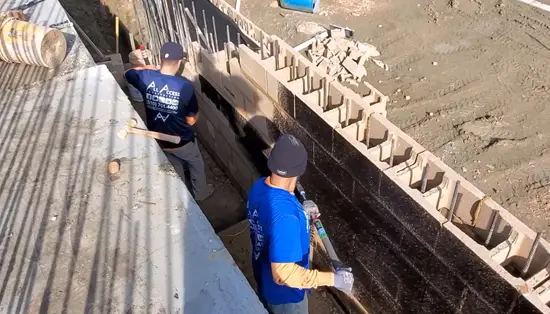
Filling in Gaps and Repairing Damage as Needed
If there are still gaps between some concrete blocks after inspection and repair then they will need to be filled prior to sealing otherwise they could cause major structural problems down the road including water leaks which could ultimately lead to costly repairs being necessary in order to fix them.
For filling gaps between blocks, caulk or mortar both work well as long as they are applied properly according to manufacturer instructions so that their efficacy can be maximized when keeping out weather elements and other outside sources which could potentially cause serious damage down the line if not addressed now.
Additionally any repairs that were made during inspection should also be double checked at this stage just in case further action needs to be taken in order for them to hold up over time once sealer has been applied.
Selecting the Appropriate Sealant for a Concrete Block Wall

When it comes to selecting the right sealant for a concrete block wall, there are many factors to consider. It is essential to choose one that not only will provide excellent protection against water leakage, but also be strong and durable enough to last for many years.
There are three main types of sealants to consider – silicone-based, acrylic-based, and polyurethane-based. Each of these has its own advantages and disadvantages, so it is important to understand the differences between them before making a final decision.
Silicone-Based Sealants
Silicone-based sealants are renowned for their strength and durability, as well as their flexibility. They are able to withstand extreme temperatures and UV radiation over long periods of time without breaking down.
They also form an effective barrier against moisture penetration and are highly resistant to chemicals, oils, and other harmful substances. The primary disadvantage of using silicone-based sealants is that they tend to be more expensive than other types of sealants available on the market today.
When choosing a silicone-based sealant for use in a concrete block wall application, it’s important to look for one with a high level of adhesion properties so that it can effectively bond with the surface being sealed.
Additionally, it’s important to ensure that the sealant meets all applicable standards for use in such an application. In some cases, an additional primer or bonding agent may need to be used in order to create an even stronger bond between the sealant and the concrete block wall surface.
Acrylic-Based Sealants
Acrylic-based sealants offer moderate strength at an affordable price point while still providing excellent protection against water leakage into the interior spaces behind concrete block walls. Acrylics have good adhesion properties so they can easily form a strong bond with the surface being sealed; however, they do not possess the same degree of flexibility as silicone-based products due to their lower elasticity rating.
This means they may break down more quickly when exposed to extreme temperature swings or heavy loads over time from windy conditions or heavy rains which could lead to cracking or peeling off from the wall surface in certain instances.
When selecting an acrylic-based product for sealing concrete block walls, look for one with good weatherability characteristics such as UV resistance so that it won’t breakdown due exposure over time from direct sunlight or heavy storms/rainfall conditions which could reduce its effectiveness over time when compared with silicone based products which typically have longer lifespans in this respect due their higher elasticity ratings .
Additionally make sure you purchase enough product up front since acrylics tend not to maintain their shape as well after repeated openings/closings like silicones do which means you’ll likely require extra material if there’s any possibility you’ll need more down the road should repairs be needed in future years caused by wear or tear (e.g., cracking or peeling).
Polyurethane-Based Sealants
Polyurethane-based sealants are often used when environmental considerations such as low VOCs (Volatile Organic Compounds) come into play since they typically produce fewer emissions than traditional solvent based options like silicones or acrylics do upon curing/drying out completely after being applied onto surfaces like concrete blocks walls .
However , polyurethanes have been known not to adhere properly on certain surfaces under certain circumstances leading to breakdown quicker if any moisture seeped behind them . As such , additional precautionary steps may need to be taken when using this type of product to ensure proper adhesion occurs between both materials .
This includes cleaning the surface thoroughly prior to application , priming wall area appropriately , and perhaps even using special adhesive tapes over top during the installation process itself depending on job specifications . Overall , polyurethane based products are affordable alternative traditional solvents but should be used cautiously to ensure maximum performance results achieved under specific conditions (such those involving moisture content levels).
Application Process for Sealing a Concrete Block Wall with a Quality Sealant
The main topics of this discussion include choosing an appropriate applicator tool, reading instructions on the label carefully and following them precisely, applying layers of sealant evenly and letting each layer dry completely, and inspecting the final result. Each topic will be addressed in detail so that readers can understand the application process more completely.
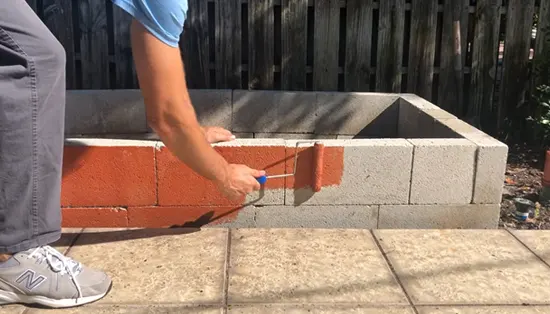
Choose an Appropriate Applicator Tool for Job at Hand (e.g., Brush or Roller)
When selecting an appropriate applicator tool for sealing a concrete block wall, it is important to consider what type of finish you want to achieve. For a professional look, it is best to use either a brush or roller. Brushes are ideal for small surfaces as they provide good coverage in tight corners and along edges; however, rollers are better suited for larger surfaces as they apply sealant faster and more evenly than brushes.
It is also important to note that different types of sealants require different applicator tools, so be sure to read the label on your specific product before making your selection.
Read Instructions on Label Carefully and Follow Precisely
When using any kind of sealant, it is essential to follow all instructions listed on the label very closely. This includes ensuring that all safety precautions are followed when handling and applying the product. Before beginning the application process it is important to read through all directions thoroughly so that you understand exactly how much time should pass between each step of the process.
If you don’t follow these instructions carefully, it could result in damage to your project or even harm yourself or others around you.
Apply First Layer of Sealant Evenly Across Entire Surface Being Treated; Let Dry Completely
Once you’ve selected an appropriate applicator tool and read through all directions thoroughly, it’s time to start applying the first layer of sealant across your surface area. When doing this step be sure to make steady strokes with your chosen applicator in order to ensure that sealant covers every inch of space evenly without over-applying in one spot or missing areas altogether.
Once this first layer has been applied, let it dry completely before proceeding with any other steps – this drying time will vary depending on what type of sealant you have chosen but generally ranges anywhere from a few hours up to 24 hours depending on temperature conditions like humidity levels outside etc..
Apply Second Layer in Same Manner as First; Let Dry Completely
Once your first layer has dried completely, repeat the same steps used in applying that one when distributing your second layer across the entire surface being sealed – again paying special attention not to miss any areas while using even strokes with whatever applicator tool you have chosen previously (brush/roller).
Once this second layer has been applied, allow it enough time to dry completely before moving onto any other steps such as adding additional coats of sealer etc.. Drying times may vary here again based on temperature/humidity levels outside etc., but generally takes about half as long as the first coat since the surface was already prepped by the previous coat allowing the second coat to adhere better which speeds up the overall drying process significantly!
Apply Third Layer; Let Dry Completely if Applicable Based on Label Instructions
If necessary based on label instructions (some products only require two layers while others call for three), apply a third layer using the same method used in prior steps – making sure not to miss any spots while using even strokes with chosen applicator tool (brush/roller).
After this third coat has been distributed allow enough time for it dry completely before inspecting results – again drying times may vary here based on environmental/weather conditions outside but usually takes about half as long as original first coat did since surface had already been prepared by previous coats allowing third coat adhere better which speeds up overall drying process considerably!
Inspect Final Result for Any Discrepancies or Problem Areas
After completing all necessary layers of sealant application according to manufacturer’s directions, inspect final result carefully looking out for any discrepancies or problems areas – these can range from streaks caused by uneven application during coating processes up until bubbling/cracking caused by incorrect amounts/types being used initially so make sure pay special attention here!
If any issues are found take necessary steps needed to fix them immediately before continuing onto the next stage otherwise there might be further damage down road due lack proper prevention measures taken now.
Maintaining Your Sealed Concrete Block Wall
Having a sealed concrete block wall can add beauty and value to your home. However, it is important to take the necessary steps to maintain your sealed concrete block wall in order to keep it looking its best and ensuring its longevity.
Maintenance involves regular inspections of the surrounding area, regular cleaning, and reapplying new coatings as needed. By taking these steps, you can help protect your wall from damage and keep it looking great for years to come.
Regular Inspection of Surroundings to Ensure Proper Conditions
It is important to regularly inspect the surrounding area of your sealed concrete block wall in order to make sure that there are no potential sources of damage or harm that could cause issues with the wall.
This includes checking for cracks or other signs of wear, as well as making sure that plants and weeds aren’t growing too close. Additionally, be on the lookout for any sources of moisture that could potentially seep into the wall, such as rainwater or groundwater. Any debris or foreign objects should also be removed in order to prevent clogging up water lines or pipes, which could lead to water buildup within the walls themselves.
Regular Cleaning To Keep Surface Free From Dirt Or Debris
Regular cleaning is essential if you want your sealed concrete block wall looking its best for years on end. It is recommended that you use a power washer on a low setting in order to remove dirt and debris from the surface without damaging it.
Additionally, using a stiff brush on stubborn areas will help get rid of caked on dirt without causing any harm. After cleaning and rinsing off any soap residue, allow your walls some time to dry before inspecting them again for any further maintenance needs.
Regular Reapplication Of New Coatings As Necessary
Over time due to weather conditions such as extreme temperatures or UV exposure, your sealed concrete block walls will lose some of their sealant protection which can leave them vulnerable to staining or other damage.
To prolong the life of your walls and ensure they stay looking their best, regular reapplication of new coatings is necessary every few years depending on climate conditions and usage levels. Before applying any new coating make sure that all dirt has been removed from the surface first by following steps outlined above; this will help achieve optimal results when applying new coatings which will protect from water damage and stains much more effectively than not doing so would allow for.
Can you paint straight onto concrete blocks?
Yes, it is possible to paint straight onto concrete blocks. First you will need to clean the surface of the blocks thoroughly, removing any dirt and debris that may be present on them. Once the surface is clean and dry, you can apply a primer or sealer before applying a coat of paint.
Primers and sealers help ensure that the paint adheres better to the block’s surface and lasts longer. It is important to use a high-quality product designed for masonry surfaces in order to get the best results. Before painting, make sure to cover any areas that should not be painted such as window frames or doors, with plastic sheeting or painter’s tape.
How do I stop water seeping through concrete blocks?
When water seeps through concrete blocks, it can cause damage over time if not addressed properly. To stop water from seeping through concrete blocks, start by checking for any cracks or visible signs of deterioration on the walls. If there are no cracks, fill any large voids between concrete blocks with mortar mix.
Make sure the mortar mix reaches deep into all crevices between each block so that there are no gaps left uncovered. You should also consider applying a waterproof coating like a sealant in order to prevent future moisture damage. Additionally, make sure to keep gutters and downspouts clear of debris so they can direct rainwater away from your home’s foundation which helps reduce risk of water damage from seeping through concrete blocks.
Does Flex Seal work on concrete blocks?
Flex Seal can be used on many different surfaces including concrete block walls as long as proper preparation has been done beforehand. Before using Flex Seal on your concrete wall, make sure it has been thoroughly cleaned free of dust and dirt particles so that the sealant adheres properly.
Once this is done, apply flexible caulk at seams where two pieces meet creating an airtight seal preventing further water damage from occurring due to gaps between each piece of block wall being sealed off properly. After caulk application wait 24 hours before applying Flex Seal allowing ample time for its cure completely preventing any leakage later down the line due its waterproof properties if applied correctly!
How long does block sealer last?
The longevity of your block sealer will depend on several factors such as type of material used and how well it was applied initially as well as environmental conditions (i.e humidity).
On average though most commercial grade polymeric based concrete masonry units (CMU) walls can last up 10 – 20 years depending on these factors however more expensive products made from acrylic resins have greater lifespan reaching up 25 years providing more durable protection against both weather elements like rain showers or snow storms while also protecting against mold growth due its antifungal properties fighting off mildew buildup commonly seen with CMU walls in damp climates which reduces maintenance cost significantly when compared against other types sealing options available!
How do you preserve hollow concrete blocks?
Preserving hollow concrete blocks is essential in order to maintain structural integrity and prevent damage caused by water exposure over time. The first step would be inspecting hollow cement blocks for any signs of wear or deterioration such as cracking or discoloration then cleaning them thoroughly with a pressure washer making sure all dirt and debris has been removed prior sealing process begins as this will ensure filler material adheres correctly upon contact with cement surface after drying out completely once finished washing!
Afterwards proceed by patching up larger more noticeable cracks using fast setting mortar then adding an exterior grade waterproofing barrier such as elastomeric coating applied directly onto cinderblock surfaces ensuring even distribution across entire section being treated finishing off procedure giving added protection against inclement weather conditions protecting your investment going forward into future prolonging life expectancy greatly!
Conclusion
Sealing your concrete block walls is essential for preserving their longevity and keeping out water damage for years to come. Knowing how to properly prepare your walls prior to applying a sealant as well as selecting an appropriate product are both important steps in making sure your project turns out just right.
Taking care to apply the sealant with precision means you can rest assured knowing that you have created an effective waterproof barrier over your walls that will last through all kinds of weather conditions.
With proper maintenance down the line such as periodically checking seals around windows or doors as well as filling any cracks that may occur over time, you can ensure that your sealed concrete block walls remain looking great while providing lasting protection against moisture damage or rot.