Last Updated on January 2, 2023
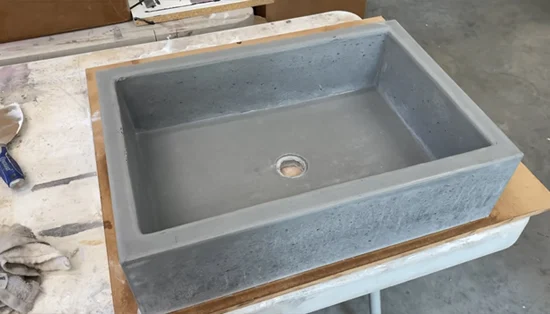
A concrete sink is a type of sink that is made from a mixture of concrete, sand, and water. This type of sink is often used in bathrooms or kitchens to provide both functionality and aesthetic appeal.
Sealing a concrete sink is essential in order to keep it clean, waterproof, and protected from damage caused by water or other elements.
Preparing the Concrete Sink for Sealing
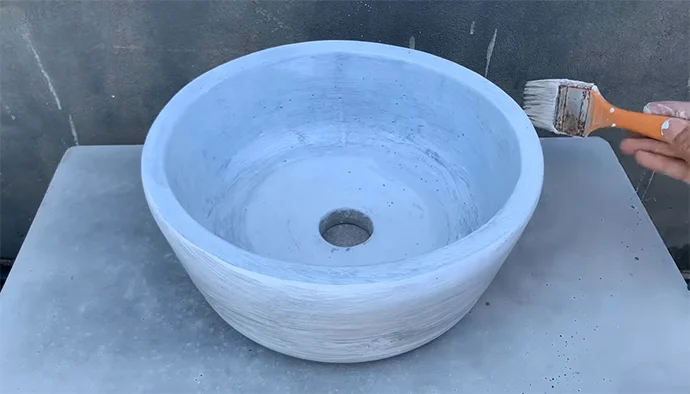
Cleaning and drying the surface of the concrete sink prior to sealing will help ensure that the sealant bonds properly with the material. Any dirt, dust or debris should be removed with a damp cloth before allowing the surface to dry fully.
In addition, any cracks or holes should be filled in with either cement or putty prior to applying any sealant.
Once any repairs are completed, a primer should be applied which helps the sealant adhere better to the surface and also reduces porosity which can cause problems over time.
Choosing the Right Sealant for Your Concrete Sink
There are several types of sealants available for use on concrete sinks including acrylics, polyurethanes, silicones and epoxies. Each type has its own unique properties as well as different levels of durability and protection against water damage so it is important to choose the right one for your specific needs.
Acrylic sealants are generally easy to apply but do not offer much in terms of water resistance while polyurethanes offer more protection but require special tools for application and have a shorter lifespan than some other types.
Silicone based sealants are very popular due to their ability to form a watertight barrier around the edges of sinks making them ideal for areas where there might be frequent contact with moisture or liquids while epoxy based ones offer superior stain resistance but will require more preparation prior to application as they need an additional primer layer before application can occur.
Due consideration should also be taken when selecting a sealant since not all types will work well together; some may react negatively when two different sealants come into contact with each other leading to discoloration or deterioration over time.
Additionally, it’s important to read up on how well each type holds up under direct sunlight since this could affect its long-term performance if exposed regularly.
Ultimately choosing the best sealing material for your concrete sink depends on your budget, needs/requirements and personal preference so taking some extra time researching what’s available and considering all pros/cons associated with each type can help ensure you make an informed decision for your project.
Applying the Sealant To Your Concrete Sink
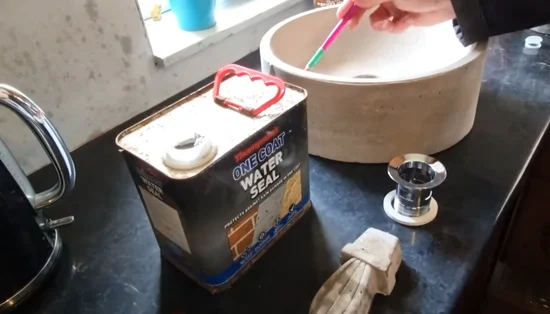
Start by applying a bead of sealant around the edges of your concrete sink’s basin and lip. Be sure to use a specialized sealant made for sealing concrete sinks; other types of sealants may not be strong enough to withstand regular wear and tear or other environmental factors. Once you have applied the bead of sealant, use a putty knife to spread it out evenly over all surfaces.
Make sure there are no gaps or air pockets that could cause problems later on. Finally, clean up any excess or spilled sealant from other surfaces using a damp rag so no residue is left behind. Let the applied sealant cure as described on its label this usually takes between 24-48 hours depending on the type of product used and instructions provided by the manufacturer.
Maintaining Your Concrete Sink Seal
To help keep your newly sealed concrete sink looking its best, make sure you check regularly for any cracks or breaks in the cured sealant. Immediately repair any damaged areas with additional putty or silicone if necessary.
It is also important to avoid drastic changes in temperature near your sink as this can cause cracks or breaks in certain types of cement-based products like concrete sinks. Be sure to wipe up spills or accidental splashes immediately to prevent staining and ensure that your sink remains well-sealed against water damage.
How long should the concrete sink be allowed to dry before beginning the sealing process?
The concrete sink needs to be allowed to dry completely before beginning the sealing process, which typically takes 24-48 hours depending on the conditions such as humidity and temperature.
It is important not to rush the drying process as this could cause problems down the line if sealant is applied too soon.
Are there any safety precautions that should be taken when working with sealant around a concrete sink?
Safety precautions should absolutely be taken when working with sealant around a concrete sink, particularly when dealing with any type of caustic materials like harsh chemicals or liquids that can damage the countertop if they come into contact with it.
When applying sealant, one should always wear protective eyewear and gloves, as well as ensure proper ventilation in the area where they are working. Additionally, it is important to keep children and pets away from the work area for their safety.
Is it important to use a primer before applying the sealant to the concrete sink?
Yes, it is very important to use a primer before applying sealant to a concrete sink as this helps ensure an even coat of sealant across the surface and will also help protect against water damage, dirt buildup, staining or discoloration of the sink over time.
Primers specifically designed for concrete surfaces should be used so that they form a bond with both the material and any other coatings present on the surface of the sink while still allowing moisture vapor transmission through it.
This helps prevent any mold or mildew growth beneath the sealant layer and prolongs its life overall.
How many coats of sealant should be applied to ensure an effective seal on the concrete sink?
For an effective seal on a concrete sink, at least two coats of sealant should be applied. It is important to ensure that each coat fully penetrates and dries before applying the next one, as proper coverage is critical for a lasting seal.
Additionally, it may be beneficial to apply an additional coat in high-traffic areas or in any places with increased wear and tear.
Topics of Interest: Leaks in a Concrete Sectional Garage: How to Seal Them
Are there any maintenance tasks that should be performed periodically after the concrete sink has been sealed?
Once a concrete sink is sealed, there are several maintenance tasks that should be performed periodically in order to protect the sealant and extend its lifespan.
First, the surface of the sink should be wiped down regularly with either a damp or dry cloth – depending on what type of sealant was used in order to remove dirt and debris. It is also recommended to occasionally apply a thin layer of wax over the surface of the sink once every few months in order to provide an extra layer of protection against dirt buildup and staining.
For oil-based seals, a cleaner designed specifically for concrete surfaces should be used every so often to help reduce residue buildup caused by cooking grease or other oils that may come into contact with the skin’s surface.
It is important to avoid chemical cleaners or abrasive scrubbing pads when cleaning sealed concrete sinks as these products can cause damage to the sealant and weaken its effectiveness over time.
Final Words
securing a quality long-lasting seal around your concrete sink should help keep it looking great for years to come if done correctly.
Following these steps from selecting the right kind of product for sealing, properly applying it with attention to detail, ensuring proper maintenance habits such as wiping up spills quickly will help ensure that the job is completed successfully without any issues down the line.
With proper care, sealing your concrete sink should provide an excellent barrier between moisture and dirt which can cause significant damage over time!