Last Updated on January 20, 2023
If you own a concrete sectional garage, you know that it is important to take the necessary steps to seal it from any and all leaks. Doing so not only protects your garage from water and other elements, but also helps maintain its integrity and preserve its value over time.
From assessing the situation and gathering materials to applying paint or primer, there are many steps involved in sealing a concrete sectional garage from leaks.
In this blog post, we’ll go through each of these steps in greater detail, providing you with the necessary information and advice required to ensure that your garage is properly sealed up against any potential leaks.
Preparation
To ensure the job is done properly, it’s necessary to assess and prepare the walls, apply sealant, fill in any gaps and finish with the right coat of paint or primer. A detailed explanation of how to properly seal a concrete sectional garage is provided here.
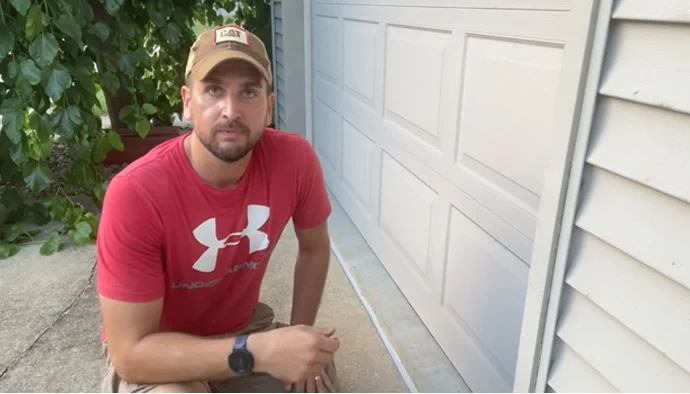
Assess the Situation:
Before sealing a concrete sectional garage from leaks, it’s important to thoroughly inspect the area for any existing damage or potential hazards. Look for cracks, holes, and other signs of deterioration that could lead to further damage if left unchecked. Additionally, check for moisture around door frames or windows and make sure there are no signs of water infiltration.
Gather Materials:
The materials needed for sealing a concrete sectional garage from leaks include silicone-based sealant, caulk gun, gloves, safety glasses/goggles, dust mask/respirator, painter’s tape/masking tape, drop cloths and paint brushes. Ensure to purchase all necessary materials before beginning the project.
Clean the Surface:
Cleaning the surface before beginning is key in ensuring proper adhesion of the sealant. Use a pressure washer to clear away dirt and debris from around door frames and window seals where caulking will be applied. A wire brush can then be used to remove any remaining dirt or grime.
Applying Sealant
Form a Perimeter:
Using painter’s tape or masking tape, create a perimeter around door frames or window seals where caulking will be applied. This will serve as a guide when applying silicone-based sealant later on in order to get even lines between surfaces that need sealing up.
Apply Concrete Cleaner:
Once you’ve formed your perimeter using painter’s tape or masking tape begin cleaning all surfaces that need caulking with concrete cleaner using a brush or scrubber pad. Make sure all areas are thoroughly cleaned before proceeding with applying silicone-based sealant later on.
Apply Silicone-Based Sealant:
Using a caulk gun loaded with silicone based sealant carefully squeeze out small amounts of sealant along inside edges of door frames or window seals within your perimeter frame (created earlier). Slowly move your hand along the perimeter frame while squeezing out small amounts of sealant at even intervals until finished with one side (door frame/window).
Repeat this process until both sides have been sealed up completely with silicone-based sealant. Allow 24 hours for drying time before proceeding onto next step (sealing up exterior wall surfaces).
Sealing Up Exterior Wall Surfaces
Inspect Wall Surfaces:
Take note of any visible pitting or cracks on exterior walls as these areas may need special attention during application process due to higher potential for water infiltration than normal areas without damage present nearby wall corner seams which may also require extra attention when sealing up exterior wall surfaces as well due to their position being vulnerable spots more exposed wind driven rain water etc.
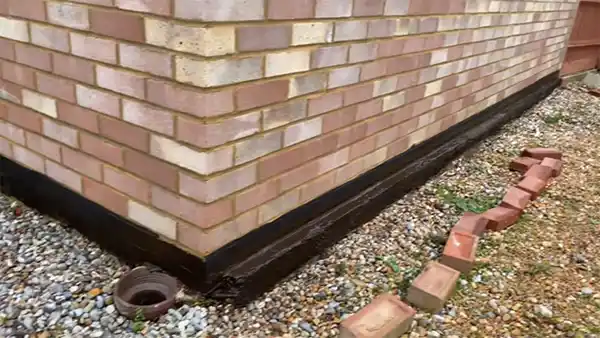
Fill in Gaps:
Using foam backer rod insert these into gaps between wall corners and then fill surrounding area with silicone-based caulk making sure not press too hard on caulk gun handle as this can cause excess amounts spill out over desired area requiring additional cleanup afterwords once done filling each gap allow ample amount time drying before painting over caulk lines etc.
Finishing Touches
Apply Paint/Primer:
After allowing 24 hours drying time apply a layer of primer over entire surface including area treated with silicone based caulk use either latex acrylic paint roller brush depending size scope project but keep mind stay least 3 feet away sprayed material order achieve best uniform coverage possible spread thin even coats each layer dry completely before adding next one coat specified instructions container down end day should have fresh looking protective coating ready protect against future elements nature.
Checklist:
To ensure you have successfully sealed your concrete sectional garage from leaks you should double check all areas below that were covered in this article; Assess situation; Gather materials; Clean surface; Form perimeter; Apply concrete cleaner; Apply silicone-based sealant; Inspect wall surfaces; Fill in gaps; Apply paint/primer.
If everything looks good go ahead celebrate knowing you have taken preventative measures against future water infiltration into your home!
Does sealing concrete make it waterproof?
Yes, sealing concrete can make it waterproof. Concrete is naturally porous, which allows water to penetrate its surface and cause damage to the underlying structure.
Applying a sealant or waterproofing agent to the concrete’s surface helps protect against this moisture intrusion. This prevents the concrete from cracking or eroding due to water damage and can help keep your garage dry and protected from the elements.
There are a variety of sealants available on the market today, including urethane-based sealers, acrylic sealers, epoxy coatings, polyurethane coatings, and more.
Each type of sealer provides different levels of protection and has different application procedures, so be sure to research each option before making a purchase.
Why does my garage leak when it rains?
Your garage may be leaking due to inadequate sealing of seams in your concrete sectional garage walls or roof. When rainwater seeps through these seams, it can eventually cause structural damage in addition to creating an uncomfortable environment for you and your family.
Additionally, improper drainage around your garage may also be contributing to leaks; if there is no way for water to escape after it has entered your garage, then it will have nowhere else to go but inside.
To fix this issue, you should inspect all seams and caulk any gaps that you find with a waterproof caulking material designed specifically for concrete garages. Additionally, installing gutters along your roofline can help ensure proper drainage away from your structure and prevent future leakage issues.
How do I stop my concrete garage from leaking?
The most effective way of stopping leaks in a concrete sectional garage is by applying a waterproof sealant or coating on its exposed surfaces such as walls and roofs.
Doing so creates an impermeable barrier between the inside of your structure and the exterior elements like rainwater or snow accumulation that could otherwise compromise its integrity over time.
Aside from waterproofing products specifically designed for garages, other options include epoxy floor coatings that provide superior protection while still allowing vapors to escape through their breathable properties ideal for reducing condensation build-up within the space as well as preventing further structural damage due to moisture intrusion.
Lastly, always make sure that proper drainage is established around your structure by inspecting gutter systems regularly and keeping them clear of debris at all times.
What is the best waterproof sealer for concrete?
The best waterproof sealer for concrete will depend on several factors including overall project goals (whether aesthetic or functional), budget constraints, ease of application process etcetera; however generally speaking some popular options include urethane-based sealers which offer excellent protection against water penetration while still being relatively easy to apply by brush or roller.
Acrylics which are strong yet flexible enough for use on vertical surfaces; epoxy coatings which create a tough barrier against moisture while also providing superior durability; and polyurethane coatings which offer unbeatable levels of protection against both physical wear-and-tear as well as chemical exposure allowing them to withstand extreme environmental conditions such as heavy rainfall without sacrificing performance over time either.
Ultimately though it’s important to research each type thoroughly according to individual needs before making any purchasing decisions in order obtain maximum value out of each product used in order maximize results achieved by one’s particular project goals.
Conclusion:
Sealing a concrete sectional garage is not something that should be taken lightly or done hastily proper preparation and knowledge are essential if you want to ensure that your garage is properly sealed against any potential leaks.
Taking the time to assess the situation, gather materials, clean the surface, form a perimeter, apply concrete cleaner and silicone-based sealant, fill any gaps and finally apply paint or primer will help ensure that your garage remains secure for years to come.
By following these simple steps outlined in this blog post, you will be able to confidently protect your concrete sectional garage from any unwanted water damage due to leaking.