Last Updated on July 14, 2022
If you are looking for information on how to repair a clamp meter, you have come to the right place. This article will help you diagnose the problem and repair your meter to its peak performance.
We will cover the basics of a clamp meter: how it works, how to test for shorts and overcurrents, and more. In addition to that, you will be able to diagnose the problem of the device’s low-level filter and capacitor.
Testing for shorts
A good way to determine whether a clamp meter has a short circuit is to disconnect the clamp halfway through the circuit. Then flex the wire harness to break the short circuit.
If the light goes out, the short circuit has been broken. If it does not, then you should replace the fuse or battery. Ultimately, you want to find the source of the short circuit and repair it as quickly as possible.
Another way to test for shorts is to plug the meter into an outlet. Make sure it delivers at least 120 volts. Next, plug the meter into a wall outlet. Set the dial to Volts AC.
Insert the black probe into the female end of the cord. Slide the red probe into the longer neutral slot. You should hear a tone if the circuit is shorted. If the circuit is intact, the voltage will be negligible.
Low-level filter
If your clamp meter has a low-level filter, it can be a good idea to perform a visual inspection to see if there’s a problem. Most clamp meters have a range from 0.1 to 100 amperes, and the range will vary depending on the brand and model.
Make sure to follow the manufacturer’s instructions to ensure that your clamp meter is functioning correctly.
Some models include features such as min, max, and average storage. When this feature is activated, new readings are compared to previously stored ones. If new readings are higher or lower than the stored values, the older readings are discarded.
In this way, the average reading is updated accordingly. But if you’re unsure of what a particular reading is, you can use your meter to check the values of several different voltages and currents in your home.
When inspecting the current reading, make sure the meter has a low-pass filter. This will ensure that no voltage is over or below the limits.
When it’s damaged, it’s vital to check that the circuit is safe. If it’s not, it’s best to contact the manufacturer for assistance. However, if the problem persists, you can try a new clamp meter without having to remove the old one.
Capacitance
If you are wondering how to repair a clamp meter, you have come to the right place. Clamp meters are great tools for troubleshooting household electronics, and they are extremely durable.
However, there are some important safety considerations you should follow when using them. First, make sure that you are not working near any energized components. Open the fuse disconnect door and the clamp meter’s door, and make sure you are working away from any exposed wires and components.
Clamp meters are broken down into three ranges. The standard current measurement will display the current as an Amp, while the microcurrent measurement will display the current as tenths of an amp.
They are useful for troubleshooting, but not for configuration. You can even use the current clamp meter to check whether a certain component is working properly. It is important to follow all manufacturer instructions to repair your meter.
You can also check your appliance’s output voltage. Many motors and compressors require a high amount of current to start, but this drops off in a matter of seconds.
As a result, many appliances use capacitors to smooth out this initial spike in current. If you are unsure of the exact voltage of your appliances, you can check their capacitors with this tool. You can compare the meter’s capacitance reading to the manufacturer’s specifications.
Testing for overloads
One of the most useful functions of a clamp meter is its ability to measure capacitance. A meter with this function is useful for checking electrolytic capacitors and motor start capacitors, which are commonly found in power supplies and controllers.
This feature gives a quick and easy way to determine the current status of a motor. To use this function, simply clamp the jaws of the clamp meter around the motor’s input leads, and then turn on the motor.
Most clamp meters are accurate to within three percent of the reading. Therefore, a meter with a three percent accuracy can measure 100 amps. To prevent this from happening, it’s important to use an appropriate clamp meter for the job.
However, it is also important to avoid pushing live conductors with a clamp meter. The insulation on the conductor could come in contact with the metal enclosure, which could lead to a phase-to-ground fault. An arc-flash could be catastrophic.
Clamp meters measure both ac and dc currents. They also measure static dc and charging dc. Clamp meters contain Hall effect sensors, which are sensitive to magnetic flux. Hall effect sensors work with both static and alternating magnetic fields.
The clamp meter consists of a toroidal iron core and a Hall effect chip that sits in a gap between its two halves. The induced magnetic flux from the current-carrying wire channels through the Hall effect chip.
2% accuracy
A clamp meter measures the AC current without making contact with the load. This meter uses the principle of magnetic induction, which is the theory that current flowing through a wire produces a magnetic field.
A Hall Effect sensor detects this magnetic field by creating a reduced voltage across the sensor. This sensor is placed at the end of the jaws of the clamp, and when the current is low, the magnetic field creates a smaller voltage.
Accuracy is the maximum error that a clamp meter can show, and is expressed as a percent of the reading. If you have a clamp meter that displays a reading that is two percent higher than the average reading, you may be able to repair it by resetting the device and re-calibrating it.
If the accuracy is 2%, you should be able to read the current with a meter that measures up to 10 amps.
Clamp meters are also known as leakage current meters and load current meters. They function similarly to leakage current meters, but they have additional features.
These meters detect minute differences in both directions. Consequently, if you are measuring a high current, you should always use a clamp meter that has a continuity beeper.
This allows you to perform many continuity tests without interrupting the circuit. Similarly, with the resistance beeper, you can use a clamp meter to troubleshoot a low-current problem. Despite the similarities, however, the two meters have important differences.
Using a flexible clamp
Clamp meters are used for the measurement of AC, charging DC, and direct current (DC). They are constructed with Hall effect sensors which detect applied magnetic fields. Hall effect sensors can work in both static and alternating magnetic fields.
Clamp meters contain a toroidal iron core and a Hall effect chip that channels the magnetic flux generated by the current-carrying wire. If one of the jaws breaks, the meter will indicate a low current.
The jaws of a clamp meter have different types. For example, a Hall Effect clamp meter has a fixed jaw and a flexible jaw, which are more flexible and suitable for accessing hard-to-reach conductors.
These tools also have different methods for measuring current without disconnecting a circuit. This method is more convenient than attempting to fix a clamp meter yourself.
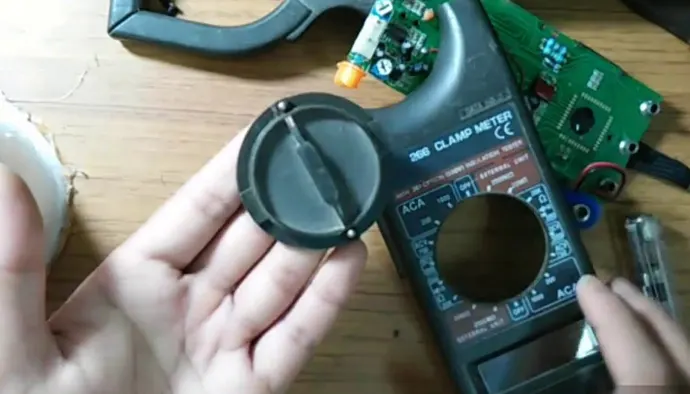
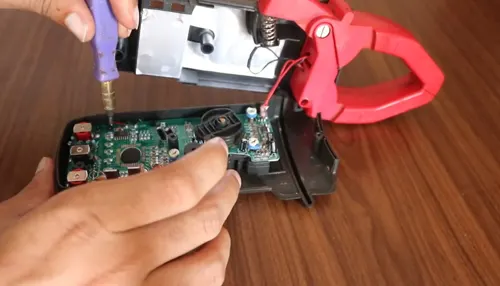
Before attempting to repair a clamp meter, it is important to perform a visual inspection and make sure that no energized components are nearby. If a problem is detected, it’s vital to shut off the circuit and disconnect the power.
If the resistance reading is greater than the upper limit of the meter, the circuit is open. It’s critical to make sure that the circuit is unplugged, as improperly performing this task could damage the meter.
Frequently Asked Questions (FAQs)
-How do you identify a broken clamp meter?
If you have a multimeter, you can use it to test the continuity of the clamp meter. If the meter is broken, there will be no continuity.
-What are the most common problems with clamp meters?
The most common problems with clamp meters are that they are not always accurate and they can be difficult to use.
-How do you troubleshoot a broken clamp meter?
There are a few things you can do to troubleshoot a broken clamp meter. First, check the batteries to make sure they are not dead. Next, check the connections to make sure they are tight and secure. Finally, check the meter itself for any damage or wear and tear.
-How do you replace a broken clamp meter?
To replace a broken clamp meter, you will need to purchase a new clamp meter and follow the instructions in the owner’s manual for installing the new one.
Conclusion
The best way to repair a clamp meter may vary depending on the specific make and model of the meter.
However, some tips on how to repair a clamp meter may include troubleshooting the device to identify the problem, consulting the owner’s manual for specific instructions on how to fix the issue, and contacting the manufacturer or a professional repair service if the problem cannot be resolved.