Last Updated on August 17, 2022
The instructions below will explain how to remove the riving knife on your Ridgid table saw. Before you start, you must unplug your saw and remove the riving knife.
While the blade guard should be installed before you remove the riving knife, make sure to install the plate first. Make sure to lock the guard lever before you move on to installing the blade guard.
Using a riving knife
If you’re looking to increase the speed and control of cutting materials, a Ridgid table saw with a riving knife system is a great choice. This metal system provides superior control over your material when you’re cutting.
You can purchase an individual riving knife, which is the same as the part that came with your table saw. This blade will help you make smoother cuts and give you a better finish than you’d have with a standard saw.
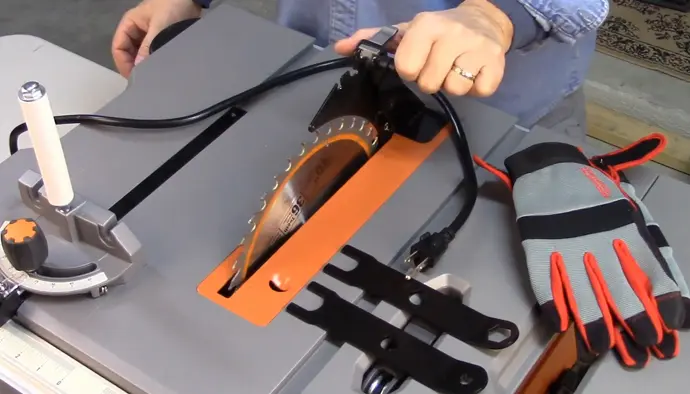
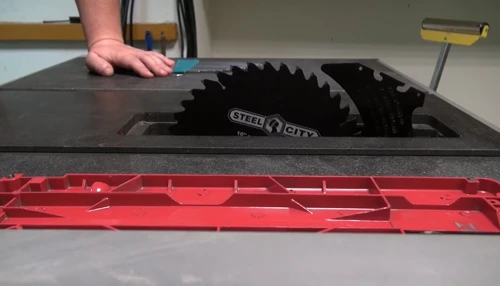
To change the riving blade on a Ridgid table saw, first remove the table insert and then remove the riving knife holder. This piece of hardware is mounted onto the trunnion, a sturdy mechanism beneath the table.
Remove the table insert to access the release mechanism, which allows you to adjust the knife in relation to the blade. The riving knife should have a gap of less than 1/4 inch between its cutting teeth and the edge of the blade.
The riving knife reduces kickback, which is an unpleasant side effect of a table saw. Kickback can send you flying or embed a piece of wood in your body.
Therefore, you should always wear appropriate clothing, safety glasses, and hearing protection while using a table saw. Also, make sure to stand safely, with your hands away from the blade and positioned in a way to reduce your risk of injury.
Using a featherboard
When working with a ridgid table saw, you will find that removing the riving blade is easier than you might think. The reason for this is the safety precaution it offers.
Kickback happens when the blade stalls abruptly and the workpiece is sucked back toward the operator. In such cases, the operator may suffer personal injury. To reduce the risk of kickback, follow the tips below.
Before you attempt to remove a riving blade, it is important to remember the proper way to do it. A good example is using a featherboard to remove a riving knife on a ridgid table saw.
This simple yet effective technique will keep your saw blade in the proper position to cut the job. Remember, however, that the featherboard is not intended to replace a riving knife.
Before you can begin removing a riving blade, first, make sure that the blade guard is off. It should be free of kickback and have anti-kickback pawls to prevent the blade from being forced back.
To remove a riving knife from your ridgid table saw, first make sure that the spreader/riving knife is in the “up” position. Then, put it back on top of the spreader/riving knife. Once the blade guard is off, press the switch key to turn off the blade.
Before removing the riving knife from a RIDGID table saw, make sure that the blade is supported by a sturdy “outrigger” and that the extension is at least 24 inches long.
The rip fence should be parallel to the blade, with the blade guard in place. Make sure that the blade guard is operating and the rip fence is parallel to the blade. The rip fence should never be used on work that is warped or twisted. To ensure safety, use a straight edge to guide your ripped work along the fence.
When removing the riving knife, make sure to use the proper miter gauge and set the saw blade at 90 degrees. Make sure that the blade is properly aligned with the saw blade and that the screws are secured.
A careless fraction of a second can lead to a serious injury. Wear protective eyewear. Eye protection should be compatible with ANSI Z87.1 and must be worn while using a ridgid table saw.
Using a splitter
You’ve probably heard about the benefits of a splitter, but you may be wondering if it is necessary. Splitters are fixed attachments that attach to the table saw or insert.
A post sticks out of the back of the saw to hold them in place. They have been around for decades, but have never really caught on. Some saws don’t have them, and this is typically the fault of a previous owner.
Typically, the riving knife is mounted to the trunnion, a sturdy mechanism under the table that raises the blade. Once attached, the riving knife has a release mechanism, which allows it to be adjusted relative to the blade. Typically, the gap between the knife edge and the blade cutting teeth is less than a quarter inch.
If you’re a beginner woodworker, the risk of injury is high. Most woodworking shows don’t show how to properly remove riving knives.
These tools are difficult to remove, and removing them can cause serious injury or even death. It’s best to follow the instructions and follow the manufacturer’s instructions on how to remove the riving knife safely.
For those with less skills and no experience, you can make your own splitter for your Ridgid table saw. Aftermarket tablesaw splitters are readily available online. They can be purchased from a dealer or online.
Just make sure to measure the width of your tablesaw and select a splitter that fits. There are a variety of aftermarket splitters available on the market that can fit into this ZCI.
In addition to removing the riving blade, you can also use a splitter to guide the wood to the edge of the blade. In this manner, you can cut the wood into the desired shape without the risk of injury.
To further reduce the risk of injury, you should wear appropriate clothing, safety glasses, and hearing protection while using a table saw. Always remember to keep your hands away from the blade. Additionally, when working with the saw, you should stand in a way to prevent injury.
Using a blade guard
The first step in using a Ridgid table saw is installing a blade guard. The guard should be installed parallel to the table and lock into place.
The blade guard can be removed by hand. When installing the blade guard, make sure the blade is positioned in the UP position. In order to use the Ridgid table saw, turn the blade guard lever clockwise to raise it to the highest position.
The Ridgid R4611 granite-top table saw features a motor that’s housed inside the cabinet. The saw has numerous safety features, including an integrated guard assembly with an anti-kickback pawl and spreader. The riving knife can be adjusted to accommodate varying thicknesses of stock.
When the blade is on, pawls are located underneath to prevent the material from moving backward during kickback. The pawls are removed by pressing the spring-loaded buttons on the blade guard.
Another safety feature is a blade guard, which keeps your hands away from the blade. The blade cover is removable by a single lever on the back hinge point.
The blade guard provides protection from wood falling onto the spinning blade. This happens in various ways, but it can result in a cutoff that shoots back at the user.
A blade guard can also protect you from the kickback caused by riving knives. In addition to that, a blade guard prevents small chips from flying into your eyes, so it’s essential to use safety glasses when using a blade guard.
Another feature of a Ridgid table saw is its miter gauge. The miter gauge is a T-shaped bar that has 45 and 90-degree stops. The front fence rail may impede access to the storage slot for the miter gauge.
In addition, the blade guard is attached separately to the splitter and features an overhead view window.
While it’s possible to remove the riving knife on a Ridgid table saw without removing the blade, many experts recommend that existing models be fitted with one.
This feature allows users to replace the blade without removing the blade guard, which saves time and energy. It also allows users to use the saw safely. The blade guard is a crucial part of any table saw, as it protects the user from being injured by the blade.
Frequently Asked Questions (FAQs)
1. How do I remove the riving knife on my Ridgid table saw?
There are two ways to remove the riving knife on a Ridgid table saw:
- Use the wrench that came with the saw to loosen the two bolts that hold the riving knife in place. Then, remove the riving knife by gently pulling it away from the saw.
- Use a screwdriver to remove the two screws that hold the riving knife in place. Then, remove the riving knife by gently pulling it away from the saw.
2. What are the steps to removing the riving knife on a Ridgid table saw?
1. Unplug the table saw and make sure it is turned off.
2. Remove the blade guard.
3. Loosen the arbor nut with a wrench.
4. Remove the riving knife by unscrewing it from the arbor.
5. Replace the riving knife with a splitter.
6. Tighten the arbor nut.
7. Replace the blade guard.
3. Is it difficult to remove the riving knife on a Ridgid table saw?
Yes, it is difficult to remove the riving knife on a Ridgid table saw.
4. Why would I need to remove the riving knife on my Ridgid table saw?
When making non-through cuts, you need to remove the riving knife so that the blade can move up and down freely.
Final Words
The article explains the process of removing a riving knife on a Ridgid table saw. It is a relatively simple process that requires only a few tools. With the right tools and a little bit of know-how, anyone can remove a riving knife from a Ridgid table saw.