Last Updated on June 16, 2022
If you’re wondering how to install wall covering, read this first! Here are some things to consider: Fabric backing is essential, as is Acrylic primer. You should also plan on bookending and estimating seams around the room.
After you’ve finished reading this article, you’ll be ready to tackle the next step! So, get ready for your first installation project! Here are some steps to guide you through the process. Just follow the steps in the article to ensure a seamless, flawless end result.
Fabric backing is required
When installing wall covering, you should use heavy-duty adhesive with low water content. If your fabric is paper-backed, apply it to the backing before installing it to the wall. Always make sure the fabric has absorbed all of the adhesive before hanging it.
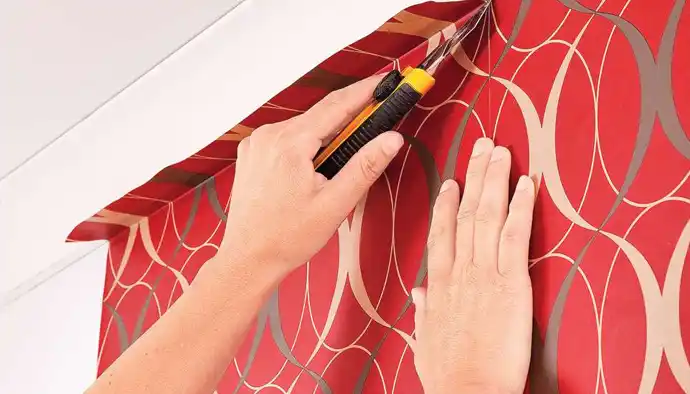
Installing wallcovering should be done at room temperature. Fabric strips should be installed straight up, in a corresponding order. The seams should be at least six inches from the corners. Cut holes for outlets and light switches if needed.
Depending on the design, a fabric may require backing. Fabric with geometric patterns is typically not backed. This is due to the lack of dimensional stability, a property of fabrics that affects their shape and sag over time.
A backing helps reinforce the fabric and provide stiffness. The backing also keeps it from sagging. If you’re installing a fabric wall covering, make sure to get samples of it with a fabric backing.
Whether you choose paper or vinyl, a fabric backing is vital for the durability of your wallcovering. Paper backing provides an additional moisture barrier, making it easier to work with. Moreover, paper fabric backing conceals imperfections in your walls.
Additionally, it serves as acoustical aide, dampening sound. Lastly, it gives the wallcovering its additional insulating properties. In a few seconds, you’ll have an entirely new wall covering.
Acrylic primer is recommended
To protect your walls from damage, you should always use an acrylic primer when installing new wallcovering. You can use an acrylic primer on oil or latex-based drywall or a builder’s flat drywall.
Alternatively, you can mix a certain size with adhesive to prepare the wall. If you’re installing new wallcovering over an older plaster or paint, you should use a different type of primer, preferably one that dries tacky.
Older homes typically have plaster walls, so an acrylic primer is recommended when you want to replace the paper. Before you can begin applying a new wallcovering, you should first remove any old wallpaper, using solvent to remove it.
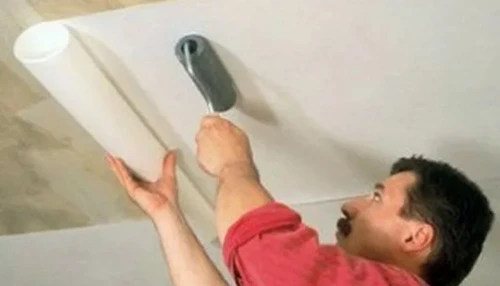
If the paper is very difficult to remove, you may want to use a wallpaper steamer to help. Once the old paper is removed, you can prime the surface with an acrylic primer.
When applying a new wallcovering, you must remove the old paste before you start. Use ROMAN Products PRO-458 GEL WALLPAPER PASTE REMOVER, which comes in a convenient spray bottle.
This product will quickly break down any residue left behind by the old wallcovering. If the adhesive dries too slowly, mildew will develop between the wallcovering and the wall.
Bookending
There are many ways to create a new look for your book shelves, and bookends are a great way to use up old junk. Old door knobs are perfect for holding a stack of books, and mason jars can be painted to look decorative beside a bookcase.
The possibilities are endless – and bookends are a great excuse to buy more books! Here are a few tips to get you started.
First, measure the wall at its center point and figure out how many bookends you’ll need. If you’re installing a single shelf, make sure you’ll have enough space to install two shelves.
If you’re installing several, plan out a layout on the floor against the wall. Position one bookend in the center and position the other equally spaced bookends on either side of the central unit.
Make note of how far they’ll need to be spaced from each other. Alternatively, you can use a sheet of paper and mark where you’ll need to install each shelf.
Estimating seam locations around the room
Before you begin applying your wallcovering, take some measurements to determine where the seams should go. You should allow about an inch of overlap on the top and bottom of each strip.
If you are using a solid color, you should leave one inch of overhang on the top and bottom of the strip. However, if the pattern is patterned, you should add an extra inch of overlap to account for the pattern.
Creating a seam at every inside corner
The seam at the inside corner of each corner panel is important because it helps the next panel remain plumb. Start by overlapping the first corner panel by an inch on the adjacent wall.
Then cut each corner panel an eighth inch longer than the three measurements. You can use the leftover corner panel to cover the rest of the wall. Make sure to cut the panel slightly at an angle to ensure a proper overlap.
When installing wallcovering with Velcro, be sure to follow the directions and avoid heavy seam work. Heavy seam work will degrade the seam bond, stretch the vinyl, and encourage snapback, which mimics the appearance of shrinking material.
You can also use a seam buster knife to provide overlap and double-cut wallcovering strips. Once the seam is properly positioned, the wallcovering strips will be easier to install.
To create a non-square corner, use the top and bottom studs 90 degrees to each other. This way, the two walls will meet on the inside of the smallest angle in the corner.
To prevent seams from developing in these corners, double the top plate and cut it flush with the wall studs. Once the top and bottom plates are finished, you’ll have a smooth surface to install your wall covering.
Water resistant wall coverings
If you’re looking for water-resistant wall coverings, you’ve come to the right place. Water-resistant wall panels, also known as “wetwall,” are a great alternative to tiles.
They combine fiberglass with plastic to create tough, yet pliable panels. Unlike tile, they are easy to clean and maintain. These panels can be ordered online and delivered right to your door. This way, you don’t have to worry about removing and replacing them.
Frequently Asked Questions (FAQs)
1.What tools do I need to install wall covering?
In order to install wall covering, you will need a few tools. These include a measuring tape, a level, a utility knife, and a hammer. You may also need a steamer if you are using paper-based wall covering.
2.What are the steps to install wall covering?
1. Choose the type of wall covering you want.
2. Measure the wall to determine how much you need.
3. Purchase the wall covering and any necessary supplies.
4. Prepare the wall by cleaning it and making any repairs as needed.
5. Hang the wall covering following the manufacturer’s instructions.
6. Trim any excess material.
7. Enjoy your new wall covering!
3.How do I ensure that the wall covering is installed correctly?
There are a few things you can do to ensure that your wall covering is installed correctly. First, make sure that you have the proper tools and materials for the job.
Second, familiarize yourself with the installation process before you begin. Third, follow the instructions carefully. fourth, take your time and be careful. fifth, if you have any questions, ask a professional for help.
4.What are some common problems that can occur during installation of wall coverings?
Some common problems that can occur during installation of wall coverings are bubbles, wrinkles, and gaps.
Final Words
After reading this article, you should have a good understanding of how to install wall coverings. There are a few things to keep in mind, such as choosing the right wallpaper or fabric, and making sure the surface is smooth.
Preparing the surface and using the correct tools will make the job much easier. With a little patience and attention to detail, you can achieve professional results.