Last Updated on June 11, 2022
You may have heard of TIG welding, but you’ve never tried it before. Not only is it an unnecessary and potentially dangerous process, but TIG welding also burns the sheet metal and can result in a cracked floor pan. Read on to learn how to install floor pans without welding. Here are a few tips and tricks:
Butt-welding
Whether you’re looking for a faster way to install floor pans or are just looking for a cleaner job, installing floor pans without butt-welds is an excellent option. Regardless of your experience level with welding sheet metal, you’ll need the right tools and equipment to get the job done correctly. Using a magnetic copper backing plate to align panels is a handy tool to have around.
When installing floor pans, there are two methods: butt-welding and overlap. The former method leaves the lip of the old pan in place while the latter method stitches to the bottom of the new pan. The former requires seam sealer and stitching, so make sure you get the right seams!
To avoid this, you should always measure and prepare your floor thoroughly. If you’re unsure of any step, you can always consult a professional.
To install floor pans without butt-welds, the first step is to disassemble your old floor pan. Use masking tape to mark the area where the repair is. Then, using an air-powered cut-off wheel, slice along the taped line.
Don’t force the air tool to cut faster; it can overheat the metal. You should carefully follow all instructions when installing floor pans.
The second step is to weld the floor pans. MIG welding is the most common method, but TIG welding is also popular. Both methods take longer, but you have the best chance of a perfect weld by using a smaller tungsten rod. Because floor pans are made from thin sheet metal, they can burn through quickly, so heat control settings will differ between models.
Grinding through spot welds
If you are replacing your current floor pan, you may be wondering how you are going to go about it. The good news is that it is easy and quick. There are several simple steps you can take to get your new floor pan installed. Here are a few tips:
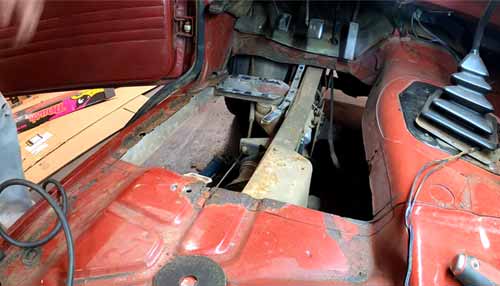
First, remove the old floor pan. It is likely spot welded to the cross member or bracing. There are a variety of ways to remove this type of spot welding. Some people opt to drill through these spot welds while others prefer to grind them through.
In either case, you must check for hidden corrosion. In many cases, a pneumatic hammer fitted with a chisel bit is enough.
After removing the spot welds, install the new panels. Using a dolly, you can beat them closed with a flat chisel. If you are not comfortable with hammering or pulling up, you can also use a self-tapping sheet metal screw to pull the panels together. Finally, apply a seam sealant before installing the new floor pan.
If the spot welds are difficult to remove, you can try drilling them through using a normal drill. This is the easiest way to remove them but you have to drill through both panels and your drill bits will get dull after a while. Moreover, drilling pilot holes first reduces the wear of your drill bits.
The procedure takes about 2 minutes for each spot weld. If you want a smooth surface, use an angle grinder or chisel.
Another option for removing floor welds is grinding through them. You can purchase special grinding wheels to remove spot welds in floor panels. You can find them at body shop wholesale suppliers or from Eastwood.
These tools are extremely affordable and easy to use. Just be sure to protect all other parts of your car while grinding through spot welds. Besides replacing floor pans, you can also install new toe boards.
Pre-drilling holes
The original floor pans were spot-welded, but a lot of restorers prefer to run a complete bead around the new panel. This not only saves time during installation but also allows the welder to cool off the cutting tip.
Besides, it is easier to stand up when drilling and re-welding the new panel than to sit. Here’s how to pre-drill holes without welding and make your life a whole lot easier!
Welding is the most common way of filling metal holes, but it is expensive and dangerous, especially if you don’t have the proper equipment. Welders have high-voltage electric circuits that can cause a serious injury.
For this reason, non-welding methods are a better option. Moreover, these methods are simple and convenient, and they pose fewer risks than welding.
Overlapping metal
There are many advantages to TIG welding floorpans, but they can also burn the sheet metal underneath. Fortunately, you can learn how to install floor pans without welding, and avoid the costly mistakes that many DIYers make.
Read on for some tips to ensure that your work is flawless and you’ll avoid any welding disasters. Here’s a step-by-step guide to install floor pans without welding.
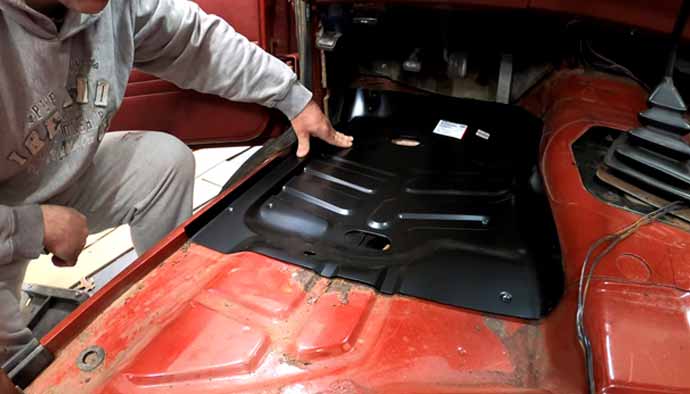
To start the process, remove the old floor pan. Then, use a 4-1/2″ electric grinder and a wire wheel to sand the floor. After sanding, you can apply a zinc-rich primer to protect the new sheet metal. Next, test-fit the new floor pan and make sure everything fits properly. You’ll be able to tell whether you’ve made a good fit.
Before installing the new floor pan, you’ll need to measure the rusted area. Depending on how badly the rusted area is, you might need to cut out a section of the floor pan or replace a portion of the floor. Make sure that the new floor pan’s dimensions can reach the underside welds. After all, the new floor pan is the most important part of a car.
If you have a metal or aluminum ground pan, you can install them without welding. While this method is less potent than adhesive methods, it will ensure the durability of the floor pans. Heavy metal pieces or chunks of sheet metal are good options for this task.
You may want to do a little research into this process before attempting to install floor pans without welding. You should be able to figure out which method will be more effective for your project.
Frequently Asked Questions (FAQs)
-What tools will I need to install floor pans without welding?
The tools you will need to install floor pans without welding are a drill, a screwdriver, a hammer, and a chisel.
-What is the process for installing floor pans without welding?
The process for installing floor pans without welding is to first remove the old floor pan and clean the area. Next, measure and cut the new floor pan to fit. Apply adhesive to the new floor pan and then install it in the vehicle.
-Are there any tips or tricks for installing floor pans without welding?
There are a few ways to install floor pans without welding. One is to use adhesive, another is to use mechanical fasteners, and another is to use a combination of both.
-What are some of the challenges I may face when installing floor pans without welding?
Some of the challenges you may face when installing floor pans without welding are:
-Making sure the floor pans fit correctly and are level
-Attaching the floor pans securely without welding
-Sealing the floor pans so they are watertight
Last Thoughts
To install floor pans without welding, you will need a few tools and some patience. First, remove the old floor pans and clean up any rust or debris. Next, measure and cut the new floor pans to fit.
Install the new floor pans using bolts and nuts, and seal the joints with caulk or silicone. Be sure to check for leaks and correct them before moving on.