Last Updated on July 14, 2022
There are several types of clamp meters on the market. To know how to calibrate a clamp meter, you must first understand how it works.
Then, you should know how to use a high-accuracy digital multimeter to calibrate the instrument. This article will also cover stray field and position sensitivity. Here’s a quick guide to calibrating a clamp meter with a high-accuracy DVM.
Digital multimeter
If you’re wondering how to calibrate a digital clamp meter, keep reading. This article will explain the process. Once you’ve mastered the basics, you can go on to perform more advanced measurements.
These meters measure voltage, resistance, and frequency. In addition, these instruments are useful for monitoring and troubleshooting in various industries. Calibration procedures for clamp meters differ slightly from one manufacturer to the next.
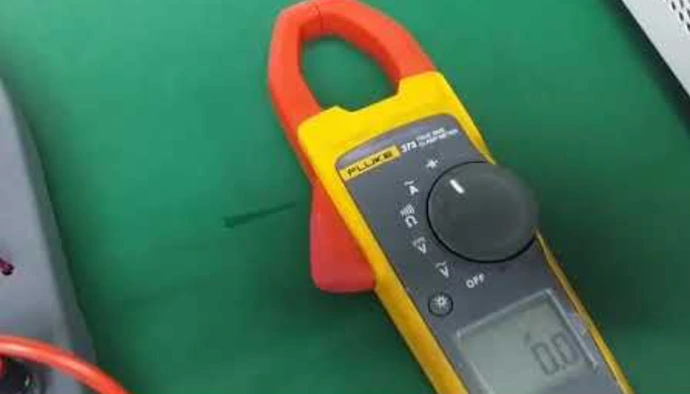
To start with, your digital clamp meter should be clean and error-free. If the meter doesn’t show the readings correctly, you may have to perform a calibration. Typically, a calibration will be performed annually.
Performing a calibration at a reputable company is highly recommended to maintain the accuracy of your instrument. Make sure you follow the manufacturer’s specifications. You’ll want to check the meter with a multimeter calibration certificate and make sure it’s clean and error-free.
Your clamp meter should measure true RMS current. Most power is a 60 hz sine wave and is smooth. However, most electrical devices change their current so that they can operate.
Likewise, your AC devices may be powered by variable frequency drives that pulsate power on and off. It’s critical to use the proper clamp meter to accurately diagnose your electrical system. But how do you calibrate a digital clamp meter?
Fluke 325 CAL True RMS Clamp Meter
The Fluke 323 CAL True RMS Clamp Meter is a great tool for general troubleshooting tasks. It’s particularly suitable for 400 A current measurements in cables with tight cable compartments. Its compact design also makes it easy to store and transport. Here are three of its top features:
The Fluke 325 CAL True RMS clamp meter offers high accuracy with noise-free results, making it a versatile tool that helps you diagnose electrical problems. Its ergonomics and large backlight display make it an ideal choice for electricians and other professionals who perform routine troubleshooting on electrical systems.
The 325 clamp meter measures AC and DC current, as well as frequency. It is also useful for troubleshooting, as it measures temperature and AC voltage, as well as confirming continuity of circuits.
The Fluke 325 CAL True RMS clamp meter is a great tool for general troubleshooting. It features TRUE-RMS current measurements, a large LCD display, and a back light to help you read in low light.
In addition, it provides true RMS measurements, ensuring you get accurate readings even in noisy circuits. Aside from accurate readings, the Fluke 325 CAL True RMS Clamp Meter is easy to use, and it comes with an extended warranty.
The Fluke 325 CAL True RMS clamp meter comes with a two-year warranty. It also comes with a soft carrying case. A compact size makes it easy to carry and transport.
Unlike other clamp meter models, this one comes with an LCD display that allows users to read the readings quickly and easily. A wide range of clamp meter readings means you can use the Fluke 325 for any electrical work.
Using an 81/2-digit high-accuracy DVM to calibrate a clamp meter

Calibration of clamp meters is a common practice. Typically, this technique is performed in laboratories, where temperature and mechanical dimensions are controlled. In some cases, however, this method can be used to calibrate a clamp meter in industrial metrological laboratories.
Here, we describe this technique and discuss its limitations. This method is most useful for current monitoring probes in the frequency domain.
A current clamp is a device that opens its jaws and clamps a conductor to measure current without physical contact or disconnection.
Clamp meters typically read the magnitude of alternating current, with the aid of additional instrumentation that can measure the phase and waveform. Some clamp meters are capable of measuring currents of up to 1000 A. Hall effect clamps, on the other hand, can measure direct current.
A traceable calibration method for current clamp meters was developed by the National Institute of Metrological Research (NIMR). This technique is not designed to be a primary reference system for high-ac-current calibrations.
However, it is applicable in industrial and secondary labs. In the current industrial context, this technique is highly useful for determining the accuracy of clamp meters.
Stray field and position sensitivity of clamp meters
There are several considerations for choosing a clamp meter. The range and number of turns of the current coil affect the clamp meter’s sensitivity. The coil’s range depends on the type of electrical current the meter is detecting.
For example, a coil with 50 turns and 20 amps of current from a 20A source could present 1,000 amps of current to a clamp meter.
Other important considerations include the position of the clamp meter’s jaws, which must be parallel to the coil’s axis and perpendicular to the conductors’ jaw plane. A free web seminar on clamp meter sensitivity is available. The recorded version is available on demand.
Clamp meters also measure other parameters like voltage, resistance, and temperature. Choosing a suitable meter is essential, as an improper one could cause the equipment to fail.
Always look for accuracy as one of the most important factors in choosing a clamp meter. A 2%+/-5 accuracy standard is widely accepted for a clamp meter. It’s important to note that the sensitivity range of a clamp meter can vary from one manufacturer to another.
When purchasing a clamp meter, consider all its features and functions before making the purchase. While they are not required for all applications, they should meet your specific measurement requirements and save you money in the long run.
Many clamp meters can also combine several instruments into a single product. They can measure voltage, current, resistance, and even continuity. A wide range of clamp meters is available, and you can find one that suits your requirements.
A clamp meter can be turned on and off by pressing a backlight button. When the LCD display is on, you can hold the displayed value for a few seconds to observe it. The LCD display shows you the values as they were measured.
You can also choose to change the measurement modes with the help of the LCD display. Most clamp meters are equipped with several functions to allow for various measurement needs. It is essential to choose one with high accuracy and sensitivity in the field of electric current.
Frequently Asked Questions (FAQs)
1. What is the process for calibrating a clamp meter?
To calibrate a clamp meter, first make sure that the meter is turned off. Next, connect the black lead to the COM (common) terminal and the red lead to the VΩmA terminal. Finally, turn the meter on and press the CAL button.
2. Why is it important to calibrate a clamp meter?
Calibrating a clamp meter is important because it ensures that the meter is reading accurately. If the meter is not calibrated, it could give false readings that could lead to incorrect decisions being made.
3. How often should I calibrate my clamp meter?
It depends on a number of factors, such as how often the meter is used, what kind of environment it is used in, and so on. However, as a general rule of thumb, it is generally recommended that you calibrate your clamp meter at least once every six months.
4. What are the consequences of not calibrating a clamp meter?
If a clamp meter is not calibrated, the readings may not be accurate. This can lead to incorrect measurements and potentially dangerous situations.
Final Words
To calibrate a clamp meter, first connect the meter to a known load and then adjust the knob until the needle is in the correct position. Once the needle is calibrated, the clamp meter is ready to use.